

Guías de Maquetas de Plástico
Bandai Gundam Decal No.142 Mobile Suit Gundam SEED Freedom 1/144 Scale General Purpose 2 Decal Sheets: Printing & Application Guide
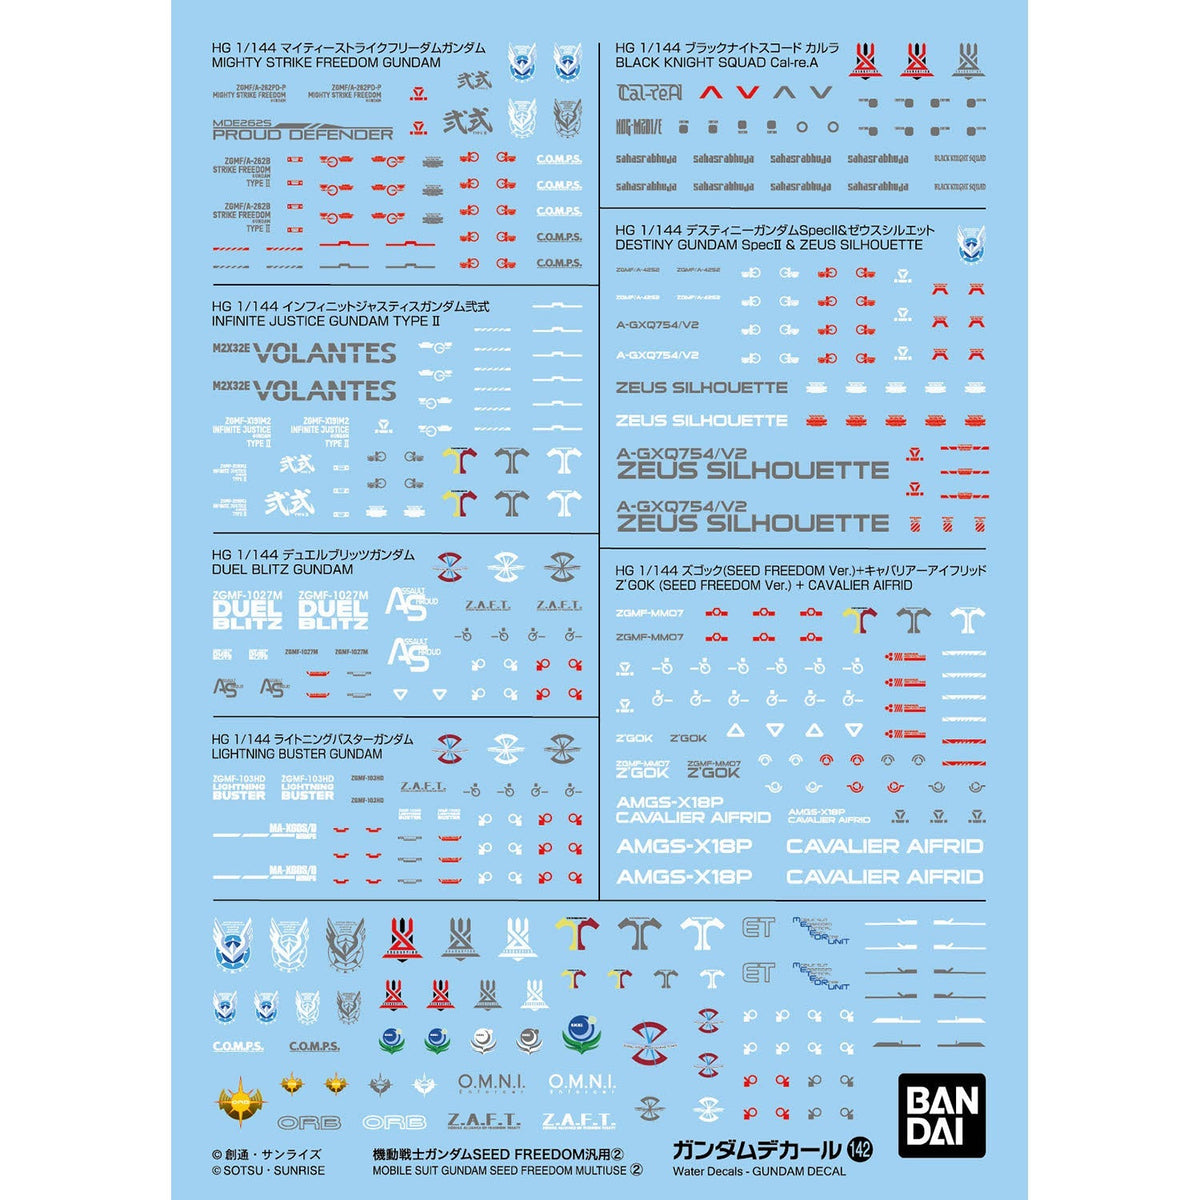
Bandai Gundam Decal No.142 Mobile Suit Gundam SEED Freedom 1/144 Scale General Purpose 2 Decal Sheets is made for model builders who want crisp markings and small printed details without trying to paint every symbol by hand. Surface preparation, careful placement, and drying time matter more than speed.
A closer look
Customize a compatible model with Bandai’s Gundam Decal No.142 Mobile Suit Gundam SEED Freedom 1/144 Scale General Purpose 2 Decal Sheets. This listing is for the named parts or accessory set. Check the series and version in the title when matching it to your build.
The stated scale is 1/144. That scale should match the surrounding model, layout, or collection.
The manufacturer item number is 2794139, while the Muncle Mikes SKU is BAS2794139. Those references help distinguish closely named products.
Prepare a smooth surface
Waterslide decals settle best over a clean gloss or satin finish. Paint should be fully cured, and dust or fingerprints should be removed before the first marking is soaked. A rough flat surface can trap air beneath the carrier film and leave a pale edge around the artwork.
Apply one marking at a time
Cut close to the printed design, dip the piece briefly in clean water, and let it rest on the backing until the film begins to move. Slide it onto the model with a damp brush, adjust the position gently, and roll away extra water with a cotton swab. Pulling the swab sideways can move or tear a small marking.
Work carefully around curves and panel lines
A setting solution can improve adhesion, while a stronger softening solution can help the film conform to recessed lines or curved armor. Test the paint and solution combination first. Once a softener is applied, leave the decal alone until it has dried, even if the film briefly looks wrinkled.
Protect the finished markings
Allow the decals to dry completely before clear coating. Begin with light coats so the carrier film, ink, paint, and clear finish can settle together without reacting. The final sheen can be flat, satin, or gloss to suit the model, but compatibility matters more than the brand name on the bottle.
Getting the best result from this decal set
Work in small sections, keep the backing sheet dry except for the marking being used, and test the paint–decal–clear-coat combination before committing to the finished model. Small markings are easier to control when the model is supported at a comfortable angle.
There is no need to use every marking. A restrained, consistent placement plan usually looks more convincing than filling every open panel simply because another decal is available.
Keep carrier film from drawing attention
Trim excess film where practical and avoid placing a large clear edge across raised detail or a deep groove. A smooth undercoat, careful water removal, and a compatible final clear coat help the printed marking look like part of the model rather than a sticker laid on top.
Use restraint on a small-scale build
At smaller scales, a few well-placed markings can communicate more than a crowded surface. Leave some plain paint around important symbols so the eye can read the design from normal viewing distance.
Study the exact product photographs


Preserve a useful starting record
Save the receipt, the product URL and one clear arrival photograph under BAS2794139. Record only what can be observed directly: package condition, included pieces, color, size, fit, damage or missing components. Do not turn an assumption about a similar product into a fact about this one.
After the first inspection, add project or collection notes separately. That keeps the original product evidence intact while still allowing the owner to document assembly choices, display location, operating results, custom work or maintenance.
Build-planning questions
Is the product ready to use without additional supplies?
Not necessarily. Paint, primer, cement, cutting tools, decal solution or mounting materials may be separate unless the contents say otherwise.
What should be dry-fitted?
Test the main assemblies, clear parts, mounting points and any accessory footprint before paint or adhesive makes the fit harder to correct.
Does the scale label answer every size question?
No. Compare actual dimensions and the intended subject, because products in the same nominal scale can represent very different real-world sizes.
How should finishing products be chosen?
Use the material and manufacturer instructions, then test the complete primer, color, decal and clear-coat system on a spare piece.
For related projects, browse Scale Model Accessories, Figures & Display Supplies · Bandai Model Kits, Figures & Accessories.

