

Model Train Guides
Woodland Scenics S194 Canister Shaker: Scale, Layout & Compatibility Guide
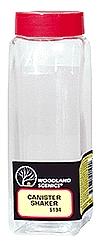
Scenery work is easier to control when you can add a little material, inspect the result and build up the next layer. Woodland Scenics S194 Canister Shaker provides a container for dispensing and storing loose landscaping materials, including turf and ballast. Its usefulness depends on the material you put inside and how carefully you apply it.
The S194 Canister Shaker listing is the exact item covered here. Woodland Scenics specifies a capacity of 32 oz (946 mL). That is a container-volume specification; it does not tell you the weight of scenery it will hold or how much layout area one filling will cover.
Choose the scenery material for the scene
S194 is a working tool beside the layout. Select the turf texture or ballast grade for the scale and appearance of the scene you are building. The same container capacity does not make a coarse material look finer on an N-scale layout.
For help judging the surrounding details, use our HO and N scenery scale guide. Check the material beside a building, vehicle or section of track before covering a large area. A small test patch is easier to change than a completed hillside.
Woodland names Fine Turf, Coarse Turf and ballast among the intended materials. Test how your chosen material dispenses over a clean sheet or scrap board first. Start with a small amount and gentle movement, then adjust from what actually lands on the surface. This avoids committing the whole scene to an unfamiliar flow rate.
Follow the application order for the material
Woodland's ballast instructions recommend S194 for application and storage. They call for placing the ballast, brushing it clear of the rails and tie tops with a soft brush, and then attaching it with Scenic Cement. Use the shaker to distribute material, then take time to shape the track area before applying adhesive. Check moving turnout parts carefully for stray grains.
The manufacturer's Blended Turf T49/T50 instructions use a different sequence: apply Scenic Cement to the area first, sprinkle the turf, then add further colors with cement between layers and a final sealing coat. Follow the instructions supplied with the material you have chosen. The shaker itself does not establish one adhesive sequence for every scenery product.
Work in sections you can reach comfortably. Protect nearby finished surfaces and leave room to inspect the edges of the application. Turf or ballast, adhesive and any brush or sprayer required for that method should be planned separately from the shaker.
Keep stored colors and grades identifiable
Label the container with the material's brand, color and grade. Keep the original product reference available so a later repair or extension can use the same material. If you deliberately mix colors, note the proportions on the label before putting the remainder away.
Keep clean unused material separate from sweepings that contain glue, dust or another color. When changing contents, check the container for leftovers before adding the next material. This is especially useful when alternating pale ballast and dark ground cover.
The current product gallery shows both red-lid and black-lid photographs. The guide hero shows a red-lid canister, while another gallery photo shows a black lid. Confirm the supplied version if lid color matters to you; these photographs do not establish a production date or a promised lid configuration. The published capacity also leaves the outside storage dimensions unspecified, so measure the actual container before building a close-fitting rack.
Set up a shaker for your next scenery session
Check the current S194 photographs and listing, then choose the turf or ballast you want to apply and store.
For the rest of your workbench, browse model-building supplies and check each product's intended material and application method.

