

Plastic Model Guides
Model Kit: Plan a First Project You Can Finish
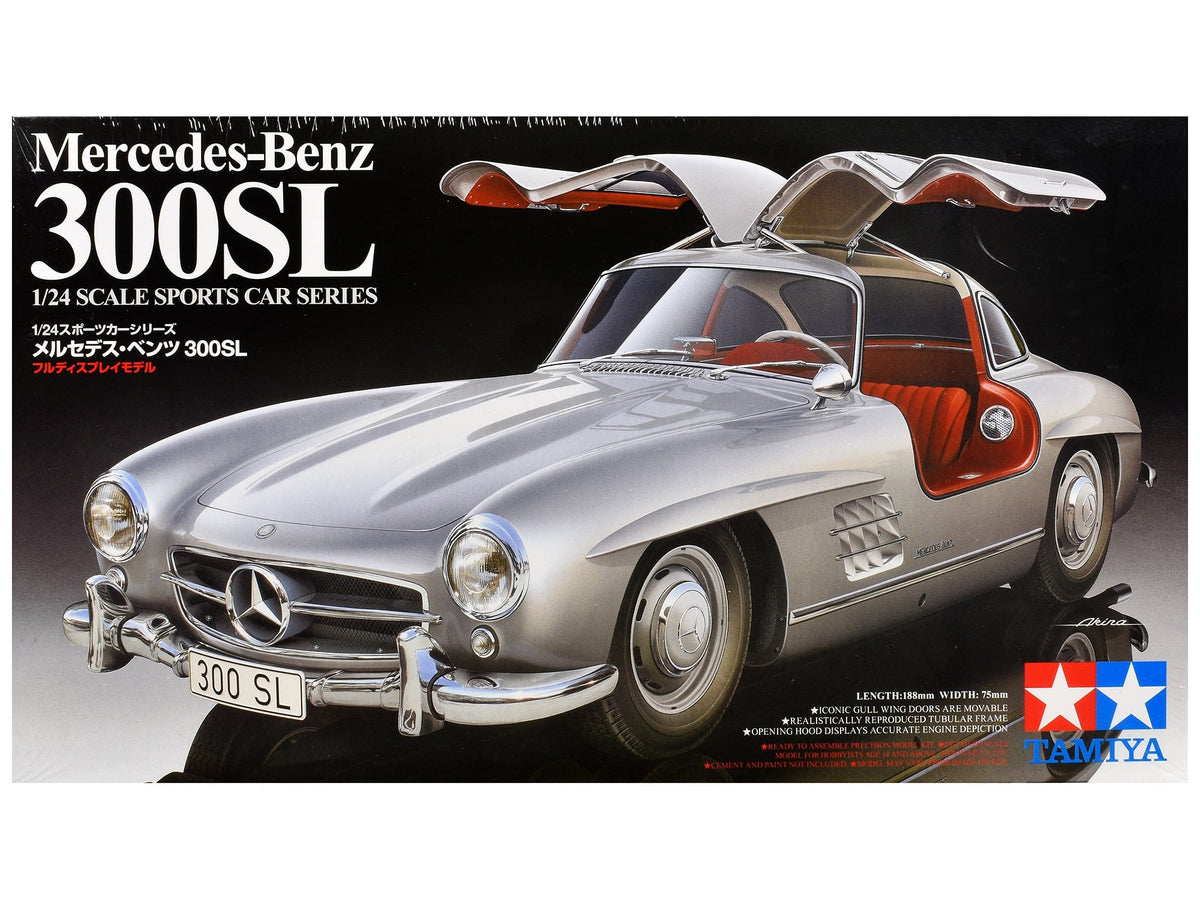
Choose a first model kit by the work you want to do, then plan one complete build before buying extra supplies. A car you love can keep you interested through careful assembly, but enthusiasm does not replace checking the instructions, required paint, adhesive and finished size. The best first project for you is one whose next steps make sense.
Start with plastic model kits. If you are still choosing between cars, aircraft and metal construction, use the guide to starting plastic models to narrow the project before filling your workbench.
Decide what a finished first build should look like
Write down the subject, the finish you want and where the model will stand. A clean road car with one body color asks for different preparation from a weathered aircraft with a masked canopy. Aiming for a tidy, complete model gives you a practical goal; every optional detail adds another decision.
Read the instruction sequence before removing parts. Identify pieces that must be painted before they become enclosed, clear parts that need protection, and any choice between versions. If the instructions depend on a technique you do not yet understand, learn that step on spare material before committing the kit.
A real planning example: Tamiya Mercedes-Benz 300SL
Tamiya 24338, 1:24 Gullwing

The Tamiya Mercedes-Benz 300SL kit is a useful example of what to inspect before choosing. Its finished dimensions are 188 × 75 × 53 mm. The tubular frame, engine, opening hood and gull-wing doors offer plenty to build and display, and they also make alignment and paint planning important.
Choose it because you want those details, not because 1:24 automatically means beginner level. Decide on the body and interior colors and the U.S. or European bumper option before assembly. Allow more display clearance than the closed-model dimensions if you want the doors or hood open.
Check the 300SL kit, included parts and current availability. If that project feels too involved, return to the kit collection and compare a simpler construction method and finish.
Compare three ways to start
| Project format | Main work | Check before ordering |
|---|---|---|
| Snap-fit kit | Part preparation and accurate assembly. | Whether this exact kit needs paint or adhesive; snap-fit does not promise a finished painted appearance. |
| Plastic kit requiring cement | Dry fitting, bonding, painting and finishing. | The recommended adhesive, paint list and parts that must be finished before assembly. |
| Starter package | The build specified by its underlying kit. | Exactly which paints, brush and adhesive are supplied; the word starter is not an inventory list. |
Make a small, specific supply list
Separate what the kit requires from upgrades you might enjoy later. For a plastic assembly project, that usually means a suitable parts cutter, a way to clean attachment points, the specified adhesive, the chosen paints and appropriate application tools. Select them for the materials in the instructions. Clear parts, plated parts and different plastics can require different handling.
Keep a stable cutting surface, good light and a place to store loose pieces. Follow tool and product labels for ventilation and handling. Choose a paint system you can use in your workspace; an airbrush is another tool to learn and is not a requirement for every first kit.
Use the first session to prevent avoidable mistakes
Check the parts against the instruction diagram, keeping related pieces together. Remove a part close to the time it is needed so its number remains easy to identify. Clean the attachment point gently, then fit the joint without adhesive. If the parts resist, check orientation and obstructions instead of forcing them together.
Test the planned paint on spare matching material. A smooth test helps you judge coverage without filling fine detail. Leave bonding surfaces as the adhesive instructions require, and let assemblies cure before loading them with the next section. Several short sessions can be easier to control than one rushed afternoon.
Questions before the first build
Does a kit include paint and glue?
Only when the exact contents say so. The Tamiya 300SL requires separately supplied paint and model cement. A photo of a painted model shows a possible result, not every item in the box.
Is a small model always easier?
No. Small parts can be harder to hold, while a large model can need more space and complex finishing. Compare the actual construction steps as well as the finished dimensions.
Should I buy detail upgrades immediately?
Only when you understand where they fit in the assembly sequence. For a first project, completing the kit cleanly can teach more than adding unfamiliar parts that complicate fit.
Return to model kits with your subject, display space and supply list in hand. For help choosing paint and preparing later projects, keep the Muncle Mikes Learning Center nearby.

