

Plastic Model Guides
Tamiya Yamaha XV1600 Road Star Custom 1:12 Model Kit 14135: Build, Paint & Assembly Guide
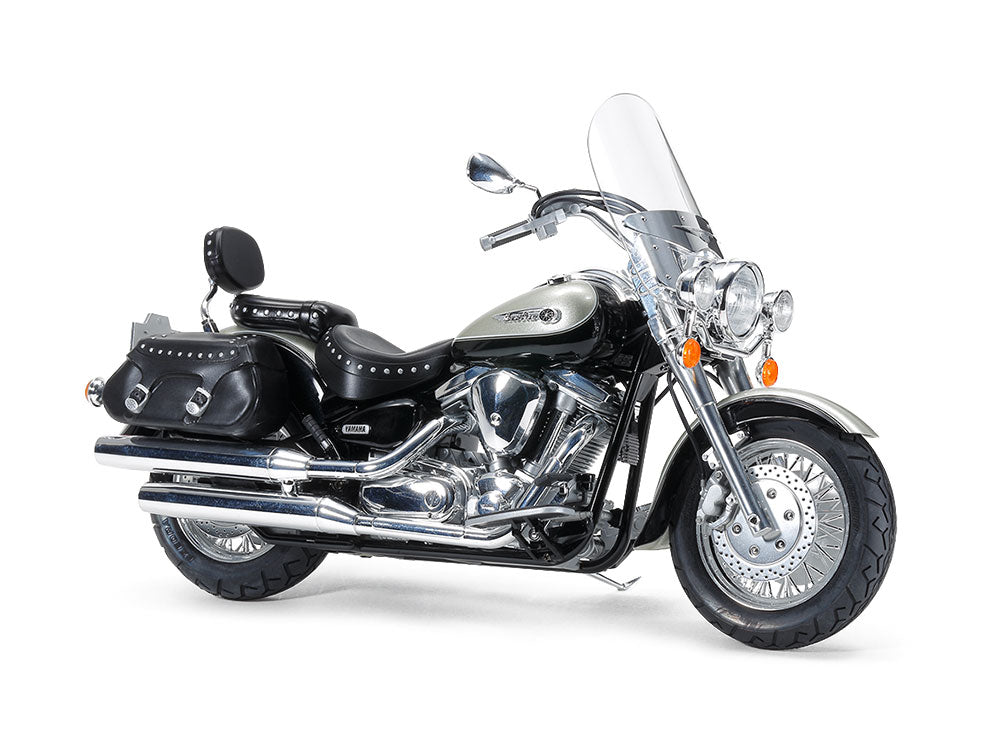
Tamiya Yamaha XV1600 Road Star Custom 1:12 Model Kit 14135 is offered by Tamiya in the motorcycle model kit category. A good result starts with understanding the scale, materials, supplied parts, and the order in which assembly, paint, or installation should happen.
What to know before getting started
Build a touring-style Road Star with a studded seat, passenger backrest, side bags and tall windshield. 1:12 plastic assembly kit; Tamiya item 14135. V-twin engine with individually represented cooling fins. Chrome and matte-plated parts. Two year-2000 marking options, rubber tires and clear display stand. Finished dimensions: 208 × 89 × 121 mm (L × W × H). Supplied as one unassembled model kit.
The stated scale is 1:12. That scale should match the surrounding model, layout, or collection.
The manufacturer item number is 14135, while the Muncle Mikes item number is TAM14135. Those references help distinguish closely named products.
Know what kind of kit you are building
Scale, subject, tooling, and kit format shape the entire project. A snap-fit kit, a glue kit, and a detail accessory may share similar box art while requiring very different tools and preparation. Read the instructions once before removing parts so the assembly and paint sequence make sense.
Inspect and dry-fit the major parts
Check runners, clear parts, tires, decals, and instructions before work begins. Test the body, chassis, interior, wings, or other large assemblies without glue. Dry fitting reveals warped parts, paint-clearance issues, and seams that are easier to correct before detail work is added.
Plan paint and assembly together
Some areas become difficult to reach after the model is closed. Decide which subassemblies need separate paint, where masking will be required, and which contact surfaces must remain clean for adhesive. Thin, fully cured coats preserve fine detail and improve final fit.
Finish with decals and careful final assembly
Apply decals over a smooth surface and allow them to dry before clear coating. During final assembly, protect clear parts and painted edges from excess adhesive. If the model resists closing, find the contact point instead of forcing the parts together.
Planning this build
Read the instructions once before cutting parts from the runners. Group the work into cleanup, test fitting, subassembly, paint, decals, and final assembly. Making those decisions early prevents closed assemblies from hiding areas that still need detail work.
Build in manageable subassemblies
Interior, chassis, engine, body, and small exterior details often benefit from separate paint and handling. The exact breakdown depends on the kit, but working in logical groups makes masking easier and reduces damage to finished parts.
Test the complete finishing system
Primer, color, decals, washes, and clear coats should be compatible with one another. A spare part or runner provides a safer test than discovering a reaction on the most visible panel of the model.
Study the exact product photographs


A careful first inspection
Begin with the exact reference TAM14135 and the current photographs for Tamiya Yamaha XV1600 Road Star Custom 1:12 Model Kit 14135. Confirm the package or item, selected variant and visible components before discarding labels or separating small parts. Inspect high-risk areas such as thin trim, mirrors, fins, axles, couplers, clear pieces and electrical contacts when those features apply.
If the item will be modified, make one dated photograph of the starting condition. That image protects the product record and gives the builder a useful reference for reassembly, wheel alignment, paint placement or later troubleshooting.
Build-planning questions
Is the product ready to use without additional supplies?
Not necessarily. Paint, primer, cement, cutting tools, decal solution or mounting materials may be separate unless the contents say otherwise.
What should be dry-fitted?
Test the main assemblies, clear parts, mounting points and any accessory footprint before paint or adhesive makes the fit harder to correct.
Does the scale label answer every size question?
No. Compare actual dimensions and the intended subject, because products in the same nominal scale can represent very different real-world sizes.
How should finishing products be chosen?
Use the material and manufacturer instructions, then test the complete primer, color, decal and clear-coat system on a spare piece.
For related projects, browse Plastic Model Kits & Scale Model Kits · Plastic Model Kits.
View Tamiya Yamaha XV1600 Road Star Custom 1:12 Model Kit 14135 at Muncle Mikes
Keep a record of your build
Keep the Tamiya 14135 instructions with notes on your paint colors, finishing products and chosen marking option. Photograph the model before final assembly and after completion so you can refer to the details when cleaning, repairing or displaying it.

