

Collector Guides
#4 vs #6 Turnouts in HO Scale: Space, Speed and Reliability
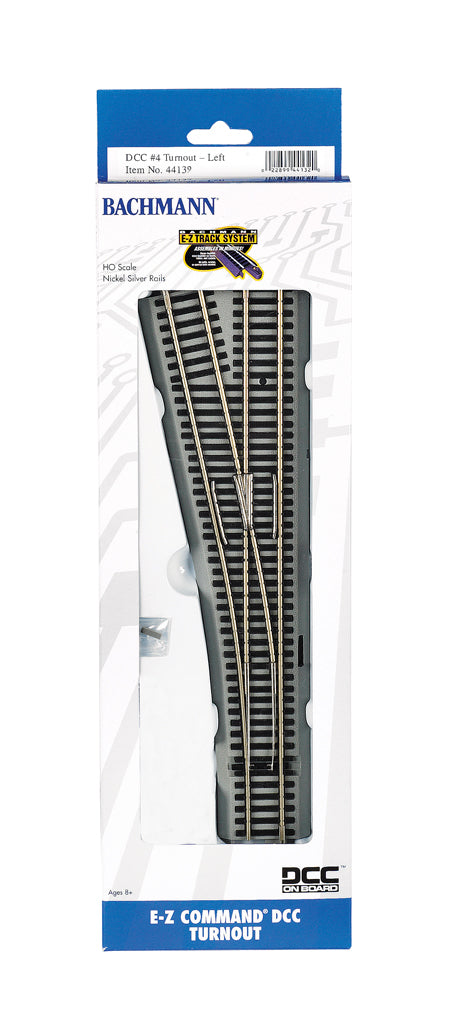
Choose a #4 turnout when a compact switching track needs to fit into a tight plan and your equipment can handle the route. Give a #6 serious consideration for longer cars, larger locomotives, or a route that needs a gentler change of direction. Neither number guarantees trouble-free running: the exact turnout, the track on either side, and the equipment passing through it all matter.
Before buying, compare the manufacturer's drawing with your track plan. Allow room for the whole crossover or yard ladder, then check the longest equipment you intend to run. A turnout that fits on the board can still leave an awkward reverse curve beyond its exit.
What #4 and #6 actually describe
The number describes the geometry at the frog, the place where the rails cross as the two routes separate. In the NMRA definition of a turnout number, a #4 frog spreads one unit for every four units along its centerline; a #6 spreads one for every six. The higher number produces a gentler divergence.
That is a geometry description, not a complete set of dimensions. It does not tell you the turnout's total length, its roadbed width, a universal equivalent curve radius, or a safe operating speed. Two manufacturers can sell turnouts with the same frog number and different overall footprints. Use the template for the exact item rather than replacing one brand with another on the assumption that the number makes them interchangeable.
Where the space goes on a layout
A compact siding or switching yard
A #4 can help keep industrial spurs and yard ladders within a limited area. Short locomotives and short freight cars generally ask less of tight geometry than long passenger cars. Even on a small switching layout, leave room beyond the points for couplers and trucks to move freely; squeezing one more siding into a plan is little help if cars cannot be pushed through it reliably.
A route for longer equipment
A #6 separates the routes more gradually. That can be useful for long rolling stock, but the extra length has to fit the complete arrangement. A crossover uses two turnouts, while a yard ladder repeats the same decision across several tracks. Lay out the entire group before deciding that the longer turnout is practical.
A #6 is not a promise that every long car or locomotive will pass. Check the equipment maker's requirements and the exact turnout geometry. For the curves beyond it, use the HO 18-inch versus 22-inch curve-radius guide as a separate planning reference.
Watch for the reverse curve after the turnout
An S-curve changes direction one way and then immediately the other. A crossover or siding entrance can create one even when the individual track pieces look reasonable. Long cars with body-mounted couplers can pull sideways on each other as they occupy opposite parts of that curve.
Where the plan allows, include straight track between opposing curves. Check the complete crossover or siding entrance with coupled cars, rather than testing only one loose car on the turnout. The model-train coupler compatibility and height guide explains another part of that connection: couplers must match and move freely as well as sit at the right height.
A larger frog number will not fix every derailment
If one wheelset keeps leaving the rails, first watch where the wheel begins to climb or drop. The place where the car finally falls over may be farther along the track. Replacing the turnout before finding that first trouble spot can leave the original problem in place.
- Check gauge: inspect the wheel spacing and track gauge with the appropriate model-railroad gauge.
- Check the points: the selected point must close properly, with no debris preventing it from seating.
- Check joints and support: look for a rail-end step, a poorly seated joiner, or a twist caused by uneven support.
- Check moving parts: trucks and couplers need to swing without binding against the body or nearby details.
- Check the frog and guard rails: clear debris and inspect the route taken by the wheel flanges.
- Check speed: start slowly while diagnosing the fault. A successful fast pass does not establish reliable slow switching, and excess speed can cause trouble of its own.
If the locomotive stops without derailing, investigate electrical continuity as well as geometry. Point contact, the frog's electrical arrangement, and the locomotive's pickup wheelbase are separate questions from the frog number.
Choose the electrical version separately
The turnout number does not tell you how its points move or how its frog is powered. Manual control, a remote motor, and a decoder-equipped turnout are different arrangements. The phrase “DCC friendly” does not by itself mean that a decoder is installed.
For concrete examples, MM carries the Bachmann 44139 E-Z Command DCC #4 left turnout and the Bachmann 44135 E-Z Command DCC #6 left turnout. Both are HO nickel-silver E-Z Track products. Bachmann identifies 44139 as decoder-equipped, with one left-hand turnout per pack.

Bachmann specifies manual or compatible NMRA-compliant DCC operation for 44135 and explicitly says that model is not designed for DC-powered layouts. Manual movement of its points does not remove that warning. Do not assume the same electrical specification applies to every Bachmann #4 or #6; read the instructions for the exact item before connecting power.
Make a temporary test before fastening track
Assemble the turnout and its adjoining track on level support. Run your most demanding locomotive and coupled cars through both routes, in both directions. Include slow switching and pushing movements as well as pulling, and watch coupler swing, body overhang, clearances, wheel behavior, and any loss of power.
Choose the smallest footprint that satisfies those checks for your planned trains, rather than choosing by number alone. Once the complete route works, compare the matching track system and control requirements in MM's model trains and track accessories collection. Keep the exact turnout drawing with your plan so the next purchase fits the route you have built.
Compare the two left-hand turnouts
Choose the frog geometry and electrical specification that fit your planned route.

