

Hot Wheels How To
Hot Wheels Replacement Wheels & Rubber Tires: Sizes, Fitment & Swap Guide
Choose the donor first, then the replacement wheels.
Hot Wheels replacement wheels are not universal 1:64 parts. Measure the exact car, identify its axle-retention method and compare the complete wheel-and-tire assembly with the space inside the body and base.
A wheel set, a tire-only pair and an axle package are different purchases. Confirm the listed quantity and hardware instead of inferring contents from a photograph.
Record five dimensions before ordering
| Measurement | What to measure | What can go wrong |
|---|---|---|
| Outside diameter | The complete tire, not only the visible rim face. | Body or fender rub. |
| Installed width | Tire width plus the inner hub or sleeve. | Contact with the base or interior. |
| Axle span | Distance needed across the chassis with both wheels seated. | Excess side play or a pinched assembly. |
| Axle/bore fit | The donor axle and the replacement wheel opening. | Loose, forced or non-rotating wheels. |
| Body clearance | Space with body, base and interior assembled. | A bare chassis rolls but the completed car binds. |
Measure the front and rear separately. A casting can accept a larger rear tire while requiring a smaller front assembly. The scale label alone does not supply these dimensions.
Matching and staggered sets solve different design problems

10 mm black five-spoke wheels and rubber tires
Four listed 10 mm wheels create a matching front-and-rear setup. Axle hardware is not assumed included.

10 mm / 12 mm gold five-spoke staggered set
Two listed 10 mm wheels and two 12 mm wheels create a staggered setup. Confirm which end of the donor can clear the larger pair.

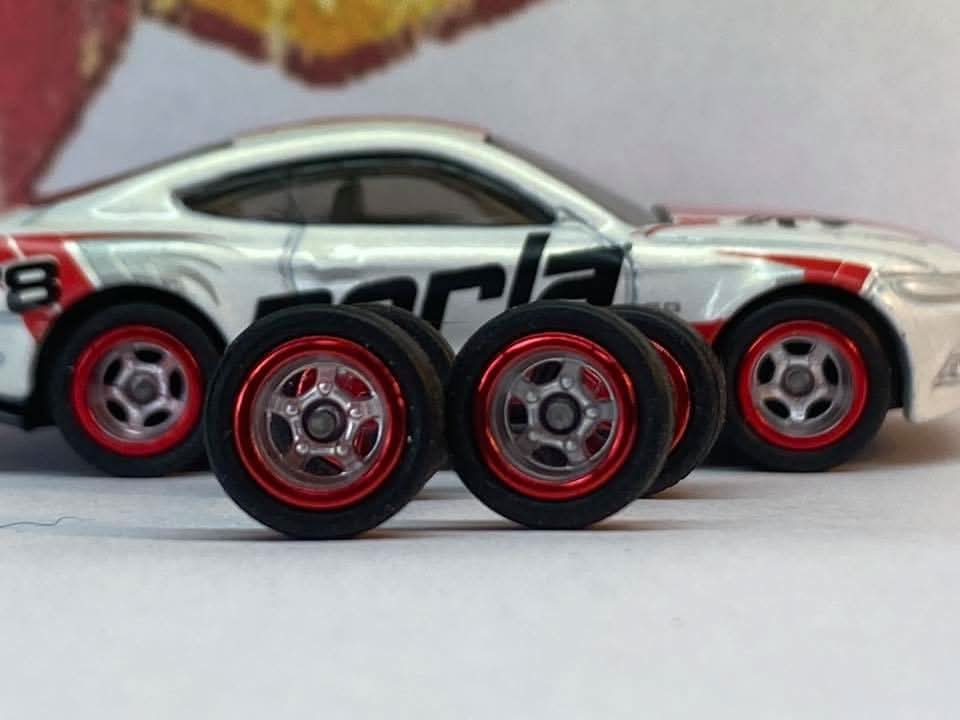
10 mm red anodized five-star wheels and tires
A matching 10 mm set with a different wheel face and finish. Style does not change the need to measure width and axle fit.

12 mm black-and-red five-spoke wheels and tires
Four listed 12 mm wheels create a larger matching setup. Diameter, width and body clearance all need checking.
These are current examples, not fit guarantees for another casting. Review each listing for current availability and exact contents.
Rubber tires only or a complete wheel set?

For a four-wheel purchase, compare the four red 5-star wheels with fitted rubber tires, listed at 10 mm or the gold deep-dish set with two listed 10 mm and two listed 12 mm wheels. Confirm axle inclusion and fit separately.
For tire-only replacement, record the existing rim’s tire seat and the replacement tire’s inner opening and width. For a complete wheel swap, record axle diameter, usable length, inner-face spacing and assembled clearance using the wheel-swap measurement worksheet.
Use a dry-fit sequence before final assembly
- Photograph the donor and preserve any original parts you remove.
- Inspect how the base retains the axles and choose the installation method before cutting or drilling.
- Seat each tire evenly and test the wheel on the intended axle without force.
- Place the assembly in the base, reinstall the interior and body, and turn each wheel by hand.
- Check both inner-hub and outer-body clearance from the front, rear and underside.
- Roll the car on a level surface only after every wheel rotates freely and remains secure.
Diagnose the contact point—not just the symptom
The tire rubs the body
Mark the exact contact point, then recheck outside diameter and tire seating. Do not remove body material until you know whether a smaller assembly solves the problem.
The wheel binds against the chassis
Check the inner hub, installed width and side spacing. The correct outside diameter can still be too wide.
The car wobbles
Inspect axle straightness, tire seating and wheel alignment. Adding adhesive before identifying the cause can lock the fault in place.
A wheel works loose
Stop the roll test and correct the retention method. Keep adhesive away from the rotating bore and axle channel.
For a method comparison, read the no-drill wheel-swap guide. “No drill” does not necessarily mean reversible if the original axle is cut.
Build from measurements, not assumptions.
Compare current replacement wheels and tires, or start with a prepared DIY project. For a complete project sequence, continue to How to Make Your Own Hot Wheels.

