

Plastic Model Guides
AMT Silhouette AMT1593: Plan the Bubble-Top Build
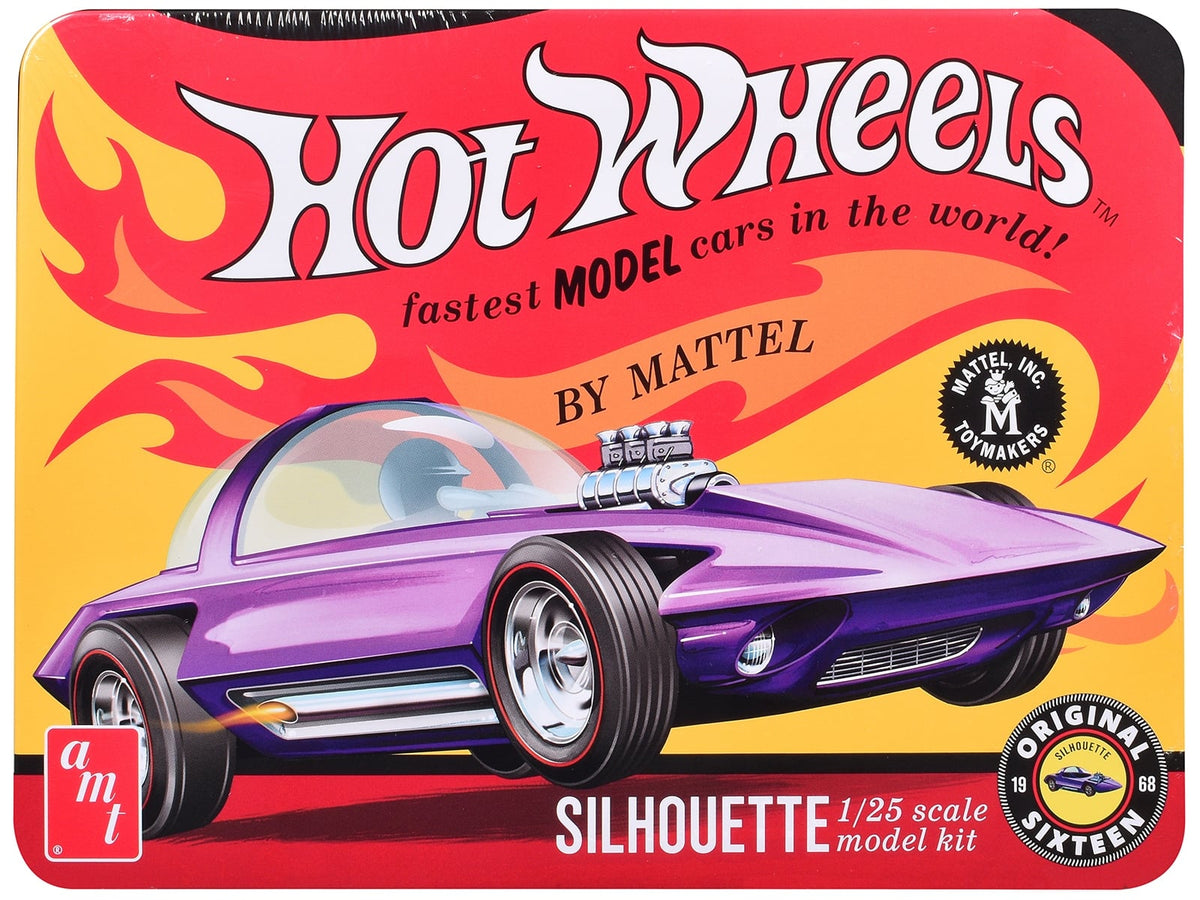
The AMT Silhouette AMT1593 is a 1:25 plastic-model project with a show car, a bubble-top hauling trailer and several ways to finish the car. Start by choosing the full bubble canopy or convertible-window option, then decide which engine, wheels and side pipes suit that look. Those choices affect what you prepare and paint before final assembly.
This collector-tin edition contains 161 parts and carries AMT's skill-level-2 rating. Paint and model cement are separate purchases. The purple car on the packaging is a finished example; the main body parts are supplied in white. Plan for a build with painting and small-part assembly rather than an immediately displayable car.
The AMT1593 collector-tin kit

Choose this edition if you want the Silhouette's bubble-top shape, optional custom details and a separate trailer project in the same kit. The current MM listing identifies it as AMT1593, item number F977-AMT1593, with vinyl tires, metal axles, plated details and water-slide decals.
See the product page for current pricing and availability.
Choose the roof before choosing the finish
The full bubble and the convertible-window parts change how the interior is seen. Neither option removes the need to finish the cockpit carefully: the seats and unusual steering unit remain visible. Decide on the interior color while planning the body color, so the two work together through or around the clear plastic.

| Option | Appearance | Build-planning consequence |
|---|---|---|
| Full bubble canopy | The clear roof continues the rounded profile shown on the tin lid. | Protect the large transparent surface and check its fit before finishing the surrounding body. |
| Convertible-window option | The open upper area changes the outline and leaves the cockpit more exposed. | Plan the visible interior and window edges together; use the corresponding parts and sequence in the kit instructions. |
AMT also supplies Astro and wire-wheel choices, two side-pipe options, and engine alternatives involving a supercharger, triple carburetors and an air scoop. Pick a coherent combination before painting the small parts. A prominent engine and bright wheels draw attention to different areas than a simpler-looking configuration. The instruction sheet determines which components belong together; extra parts do not mean every option can be fitted at once.
Test the body, interior and chassis together
Start with the parts overview and the instruction sheet in your own kit. Separate the body and trailer components, clear pieces, plated parts, tires, axles and decals into protected groups. Leave small parts attached to their runners until their assembly stage needs them. Check for missing or damaged pieces before paint or cement makes the project harder to return or correct.
As the instructions allow, temporarily bring the body, interior and chassis together without glue. Look at the fit around the cockpit, the stance on a flat surface and the clearance around the wheels. A misplaced interior or an untrimmed attachment point can keep larger parts from seating. Find the obstruction before removing material; do not force the body down onto the chassis.
The kit includes opening hood and trunk features. Check the intended movement and attachment points before applying the exterior finish, keeping cement away from any joint the instructions identify as movable. Paint adds thickness, so keep important mating surfaces and clearances in mind when masking. The dry-fitting guide explains how to separate an alignment problem from a part that actually needs adjustment.
Keep clear parts away from body-paint work

The bubble is a large, conspicuous part of the finished car. Handle it by its edges, keep it away from loose abrasive material and protect it while preparing the body. Check its seating gently before paint. A canopy that needs pressure to fit deserves another look at the surrounding assembly before you reach for adhesive.
Use adhesive intended for the actual material and joint. Ordinary solvent-type plastic cement works by dissolving compatible plastic; a product suitable for an opaque body joint is not automatically suitable for a visible clear surface. Choose a clear-part adhesive whose label covers that plastic, and follow its application and drying directions. Use the exact product instructions and a test piece whenever the material is not confirmed.
Plan separate work on the body, cockpit, chassis and engine where the kit sequence permits it. Finish surfaces that will become difficult to reach before closing the surrounding assembly. Keep the tires and clear pieces away from overspray. The model-kit painting-order guide develops that access-first approach.
For a purple finish, choose your own compatible model-paint system; the packaging does not identify a guaranteed paint match. Test primer, color and any optional clear finish together on suitable spare material. Follow their preparation, recoat and curing directions instead of applying one fixed waiting time to every product. Young builders need the adult supervision stated on the packaging, and everyone should follow the tools' and finishing products' ventilation and protective-equipment instructions.
Decals and the trailer are part of the display plan
The water-slide sheet includes Hot Wheels graphics and number designs. Decide where they belong before wetting them, checking how each marking relates to body edges and opening panels. Apply them according to the decal directions after the underlying finish is ready. If you want a clear coat afterward, first check that the coating, paint and decals are compatible; leave the transparent canopy out of body-finishing experiments.
The bubble-top hauling trailer is another assembly project, separate from the metal collector tin. Building and displaying the car alone keeps attention on its shape. Adding the trailer creates a larger scene and adds another painted body and clear cover to prepare. Neither the tin's outside dimensions nor the car's scale tells you the complete display footprint. Check the assembled layout, including projecting parts and any opened panels, before choosing a case.
Do not assume the trailer will connect to any other 1:25 model just because the scale matches. For a larger display with another vehicle, compare the hitch arrangement and clearances before committing to that layout.
Questions before you start
Is this a finished Hot Wheels car?
No. AMT1593 is a larger plastic kit that needs assembly, paint and cement. If you are identifying the small anniversary die-cast car, use the separate 1993 Silhouette collector guide.
Does skill level 2 mean no glue or paint?
No. AMT explicitly lists both as required. The 161 parts, optional configurations and clear canopy make the task more involved than choosing a color for the outside. Check that you are comfortable with small-part handling and the tools your chosen method needs.
Can I switch the roof version after completing the model?
Choose the version before assembly. Follow the AMT1593 sheet for the attachment method and do not assume a glued part will remain interchangeable. Keep unused optional pieces if you want to revisit the project later.
Are the trailer and collector tin the same thing?
No. The trailer is part of the plastic-model project; the tin is its packaging. A collector tin does not establish that a completed car and trailer will fit inside without touching or stressing delicate parts.
What should I check before cutting parts from the runners?
Match AMT1593 on the package, review the complete parts and decal contents, and read the assembly alternatives. If something is missing, keep the receipt and package identifier so the exact kit and affected part can be identified before work continues.
For another subject, browse AMT kits and accessories, comparing the required assembly and supplies for each release. Continue with Plastic Model Guides, the Hobby Learning Center or Collector Guides as you plan the next project.

