

Plastic Model Guides
Tamiya F-14D Tomcat 61118: 1:48 Build and Paint Guide
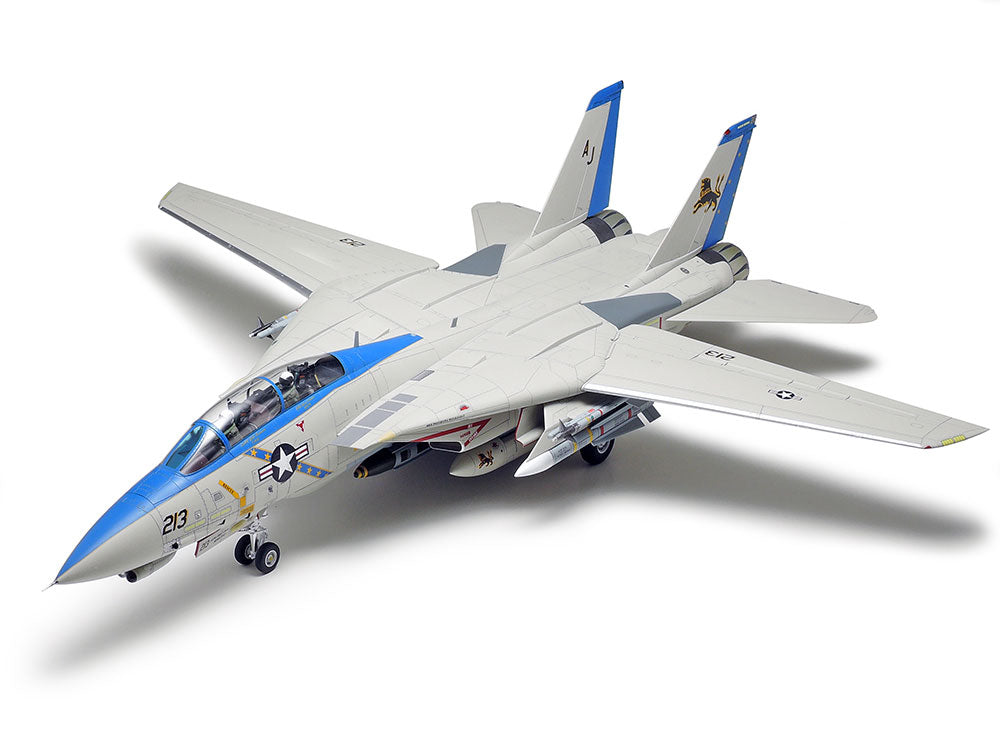
The Tamiya F-14D Tomcat 61118 is a 1:48 plastic assembly kit with several decisions to make before the first parts are joined: markings, stores, wing position and the areas you want visible. Choose those together, then organize the build around the selected aircraft. This guide helps you prepare that sequence; use the kit's own instructions for the exact part numbers and assembly order.
Allow room for the finished aircraft as well as the work in progress. Tamiya specifies a 398 mm fuselage and a maximum wingspan of 408 mm. Mark that outline on your display surface and leave handling space around the nose, tails and wing tips.
The exact kit: Tamiya 61118

Look for manufacturer item 61118, listed by Muncle Mikes as TAM61118. The box contains an unassembled model; cement, paint and finishing supplies are additional requirements. Finished-model photographs show a possible result, not a prebuilt aircraft supplied in the box.
Choose one configuration before painting
The kit provides four marking options and several missile, bomb and pod choices. Select a marking scheme and follow its matching stores diagram. The presence of a part on a sprue is not a reason to install it on every aircraft. Keep unused options labeled so they cannot be mistaken for missing assembly steps later.
| Choice | What to plan | Before committing |
|---|---|---|
| Wings forward or swept | The kit has moving wings and interchangeable sealing-plate and airbag parts for the end positions. | Keep the matching parts together and check clearance before finishing the wing roots. |
| Missile, bombing or reconnaissance configuration | Stores change the parts and paint work under the aircraft. | Use the selected option's instructions instead of filling every attachment point. |
| More or less cockpit visibility | Clear parts and the cockpit need a coordinated paint and assembly plan. | Test the fit before painting mating edges; protect clear surfaces while handling the fuselage. |
Prepare the cockpit and enclosed areas first
Read ahead to identify anything that becomes difficult to reach after the fuselage closes. Put those parts in a separate tray with the relevant instruction steps. Prepare the interior colors before attaching the clear parts, and inspect the cockpit from the angle at which the model will be displayed. Detail that is easy to see on the bench may be partly hidden after assembly.
Remove each part from its frame with suitable cutters, leaving material for careful cleanup where necessary. Support thin pieces while trimming. Test each joint without adhesive, then check that paint has not built up on the contact surfaces. If a joint needs force, find the interference before adding cement.
Protect the wing mechanism while building the airframe
Assemble the moving areas according to the instructions and distinguish the joints that must be bonded from the parts that must remain free. Check movement gently before surrounding assemblies restrict access. Avoid using the wing tips as handles or forcing a painted mechanism past resistance.

Check the main airframe joints under good light before proceeding to paint. Work on a small area at a time and protect nearby engraved detail while cleaning a seam. Fit the landing gear, stores and small projections at the points specified in the instructions; decide how you will support the model during finishing without loading those delicate parts.
Build a paint list for the chosen markings
Start with the kit's color callouts for your selected scheme, then list the cockpit, landing gear, exhaust, stores and clear-part work separately. This makes it easier to see which colors you already own. A photograph is useful for understanding the arrangement, but lighting and screen color make it an unreliable paint-matching chart.
Canopy masking stickers are included. Check their placement on the clear parts before applying paint, keeping the transparent areas protected. Test the planned primer, colors and clear finish on spare material first, following each product's application and drying instructions. Avoid discovering an incompatible finishing combination on the completed airframe.
Prepare decals in the order that suits the marking diagram. Check orientation and placement before wetting each marking, and allow it to settle and dry before handling that area. Use setting products only as their instructions permit. Add weathering gradually so it remains a deliberate finish choice rather than a way to conceal unresolved assembly work.
Questions before starting the F-14D
Is 61118 a snap-together or prepainted model?
No. It is a plastic assembly kit that requires cement, paint and finishing supplies. The decorated aircraft in the photos is a completed example.
Can I display the wings in different positions?
The kit provides moving wings and separate matching parts for the fully forward and swept positions. Follow the assembly instructions and keep the interchangeable pieces identified.
How long will the build take?
There is no useful single promise. Cockpit detail, the selected stores, masking, paint drying and the finish you want all change the workload. Plan separate sessions for preparation, assembly, painting and markings.
Should I buy every accessory before opening the box?
Start with the kit instructions and required materials. Add an accessory only after its exact compatibility and purpose are established; another F-14 variant or scale is not enough to establish fit.
Return to the Tamiya guide hub for related projects, compare other 1:48 aircraft and model kits, or review hobby tools and paint supplies against your chosen build plan.

