

Hot Wheels How To
Build a Custom Hot Wheels Gasser: ’55 Chevy Project Plan
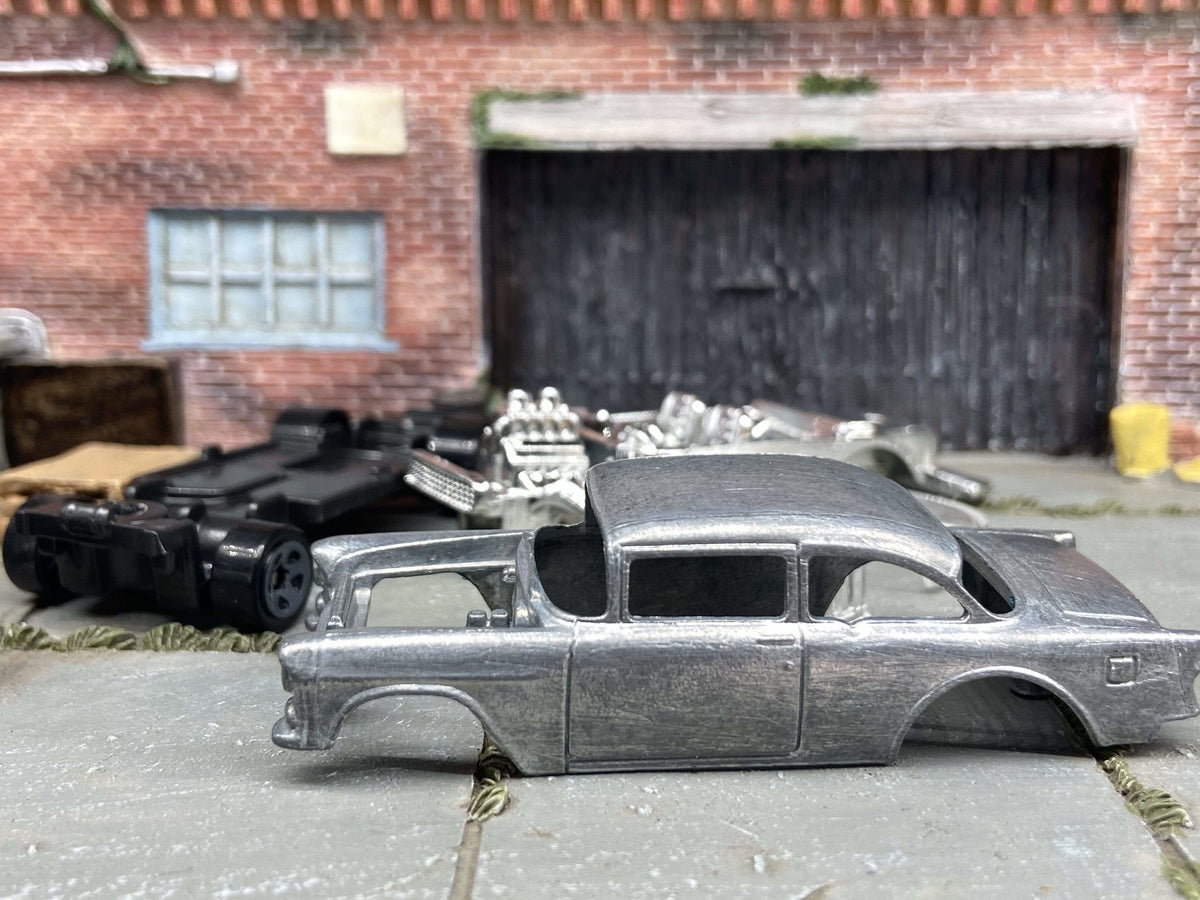
Plan the stance before you plan the paint.
To build a custom Hot Wheels gasser, start with a donor and a clear side-profile idea. Decide how the body, front tires and rear tires should look together, then verify the fit before changing the finish.
This project plan uses the Muncle Mikes ’55 Chevy Gasser DIY kit as a concrete starting point. It does not require you to turn an unrelated casting into a gasser by cutting an unknown chassis.
Header photo: the unpainted DIY kit, not a finished rubber-tire custom. Product pages show current prices, stock and included parts.
Step 1: choose a reference and a realistic project scope
Choose between recreating a specific car's appearance and making a freestyle custom. For a replica, work from photographs of the particular car and its details. For a first freestyle build, a simple body finish and a coordinated wheel set keep the project easier to inspect.
A classic gasser look often combines narrower front wheels with larger drag-oriented rear tires, but the exact setup should follow the donor's clearance and the style you want rather than a single factory example.
For finished color ideas, compare our five custom gasser examples. Choose a look you enjoy rather than copying an unsupported claim about which car is fastest or most valuable.
Step 2: understand the prepared DIY project
The ’55 Chevy Gasser DIY kit is described as stripped and ready to paint. The listing identifies 10 mm / 12 mm wheel sizing and notes that original component details can vary.
Read the actual kit's pieces and assembly method. A prepared DIY project is not an all-tools-included workshop kit. Custom upgrade wheels, tires, axles, paints and finishing supplies are separate unless explicitly included.
Photograph and dry-fit the original pieces before finishing. Look at the body, interior, windows, base and mounting points so you know what must remain aligned after paint.
Build the gasser look from the donor outward
These MM products show the three decisions separately: the prepared DIY project, the wheel-and-tire setup, and the finished custom. Keeping those decisions separate makes the project easier to plan.

prepared DIY project
1955 Chevy Gasser DIY kit
The casting-specific starting point for this project plan.

Staggered wheel set
Gold 10 mm / 12 mm wheels
A coordinated smaller-front/larger-rear wheel example for a gasser-style stance when the donor clears it.

Finished custom
Satin red 1955 Chevy Gasser
A finished reference for builders comparing stance, color and wheel treatment—or buyers who would rather skip the build.
Step 3: set the side profile without creating a fit problem
Place the assembled donor on a flat surface and photograph it at wheel height. Decide what should remain as-is before changing tire sizes or mounting geometry. If the intended look is nose-high, automatically lowering the front works against that goal.
Narrower front tires and smaller-diameter front tires are different choices. Width changes the front-on appearance. With mounting positions unchanged, a smaller front tire lowers the front axle's height above the ground; it does not raise the nose by itself.
Use the donor's existing arrangement as your starting point. This guide does not prescribe chassis cuts, spacers or ride-height dimensions without a physical fitment plan.
Step 4: choose wheels and tires that fit that plan
| Part choice | Catalog example | What to confirm |
|---|---|---|
| A coordinated staggered set | Gold five-spoke 10 mm / 12 mm wheels with rubber tires | The current size label is 10mm/12mm; confirm quantity, installed tire dimensions and axle compatibility. |
| A larger wheel-and-tire option | 13 mm red wheels and rubber tires | Current listing describes wheels with rubber tires. Confirm quantity, axle hardware and installed clearance. |
| Another finish or wheel face | The wheels-and-tires collection | Exact quantities, front/rear sizes and mounting hardware. |
These examples are separate parts, not a verified bundle. Matching size labels do not settle hub fit, width or clearance. Test with the body in place and leave enough room for the wheels to rotate without rubbing.
The gasser wheel guide explains the measurement checks in more detail.
Step 5: finish the body after the mechanical fit works
Choose a compatible preparation, primer and color system for the actual body material. Test it on a sample and follow the manufacturer's application and cure instructions. Protect body details and mating surfaces from unnecessary buildup.
Plan graphics around the shape of the body and its panel lines. Identify the decal type and follow its instructions; a waterslide transfer and a self-adhesive sticker require different application. Test any proposed clear coat with a spare sample before applying it over the completed graphics.
Do not use heat shortcuts to force paint curing or soften parts for disassembly. Keep paint and adhesive out of wheel bores and axle channels. The general custom-build guide covers the preparation-to-assembly sequence.
Step 6: assemble using the donor's intended method
Check that the windows and interior sit correctly, the body meets the base without force and the axle arrangement remains secure. Use the fastening or adhesive method appropriate to the kit, allowing its specified set time before handling.
Cutting, drilling and sharp-axle handling require adult work, eye protection and a secured workpiece. A small diecast body should not be held loosely against a powered tool.
Step 7: inspect the completed gasser
Review the car from both sides, front, rear and underside. Check tire seating, even wheel spacing, secure attachment and the side profile you planned. Set it on a level surface and confirm the contact points.
Roll it gently when rolling is part of the goal. Diagnose rubbing or wobble before calling the build finished. A visual drag-racing theme is not a speed test; do not label the model track-tuned without testing the actual assembly.
Record the donor, replacement parts and finish work. Label the result as your custom rather than an original factory variation. Keep the build notes so your next gasser starts from what you learned.
Building a custom Hot Wheels gasser: FAQs
Should I lower the front to make a gasser?
Not as an automatic rule. Choose the desired profile first. Lowering the front or reducing front tire diameter does not create a raised nose by itself.
Does the ’55 Chevy kit include the aftermarket wheels shown in other listings?
No such inclusion is implied. Check its original pieces and buy custom upgrades separately when needed.
Are the listed 13 mm parts a guaranteed fit?
No. Confirm the current contents, installed diameter, width, axle arrangement and body clearance before choosing the parts.
Can I build a good display without heavy body cutting?
Start with a donor whose shape and layout already support your idea. A coherent finish and compatible wheel setup can be the whole project.
Where can I buy an already finished gasser?
Browse custom Hot Wheels gassers and check the exact finish, wheel details and contents of each product.
Start with the gasser you want to build.
Ask about a donor or part with the product link and measurements before committing to a fit-sensitive purchase.
Gasser build resource path
Compare the 1964 Nova Wagon Gasser guide, the gasser wheel guide, and the general DIY build guide. Shop finished gassers, DIY kits, or wheels and tires.
Order by current part details rather than an old product handle
Some long product URLs retain earlier wording. The currently linked 13mm parts listing describes red wheels with rubber tires; it does not establish the older handle’s Firestone branding, tire-only quantity or included axle hardware. Read the current title and description and resolve any missing contents before placing a fit-sensitive order.
| Part decision | Confirm before ordering |
|---|---|
| Complete wheel-and-tire set | Quantity, front/rear dimensions and axle/retention requirements |
| Tires only | Explicit tire-only contents, rim-seat fit and installed outside dimensions |
| Finished gasser reference | The photographed installed setup; separate packs are not implied |
| Prepared gasser donor | Supplied original parts and the kit’s assembly method |
The gold 10mm/12mm listing is an alternative assembly to compare, not a measured-fit bundle with this donor. The completed satin-red gasser is a visual reference, not a claim that those separate gold or red parts were used on it. Keep a part number or product URL beside each actual component you select, then photograph your own dry-fit result before painting. That creates a repeatable build record without turning nominal labels or unrelated product photos into compatibility proof.

