

Plastic Model Guides
Aircraft Model Kits Guide: Scale, Skill Level and Better First Builds
Aircraft model kits combine scale, airframe shape, cockpit detail, clear parts, landing gear, markings, and paint into one project. The right first aircraft is not simply the kit with the fewest pieces. Wingspan, seam location, canopy design, gear strength, camouflage, decals, and the builder’s display space all determine difficulty.
This guide explains how to choose and build plastic aircraft projects without mixing them with finished diecast airplanes. Muncle Mikes carries buildable kits in the Plastic Model Kits collection. Finished GeminiJets, Corgi, Hobby Master, and similar products belong to a different category and should not be described as kits.
Compare a compact starter with a more involved jet
| Kit | Size and complexity | Supplies |
|---|---|---|
| Revell 74160 Bf 109 G-10 | 1:72; Revell level 3; 126 mm long with a 138 mm wingspan. | Starter package lists basic paints, a brush and glue. |
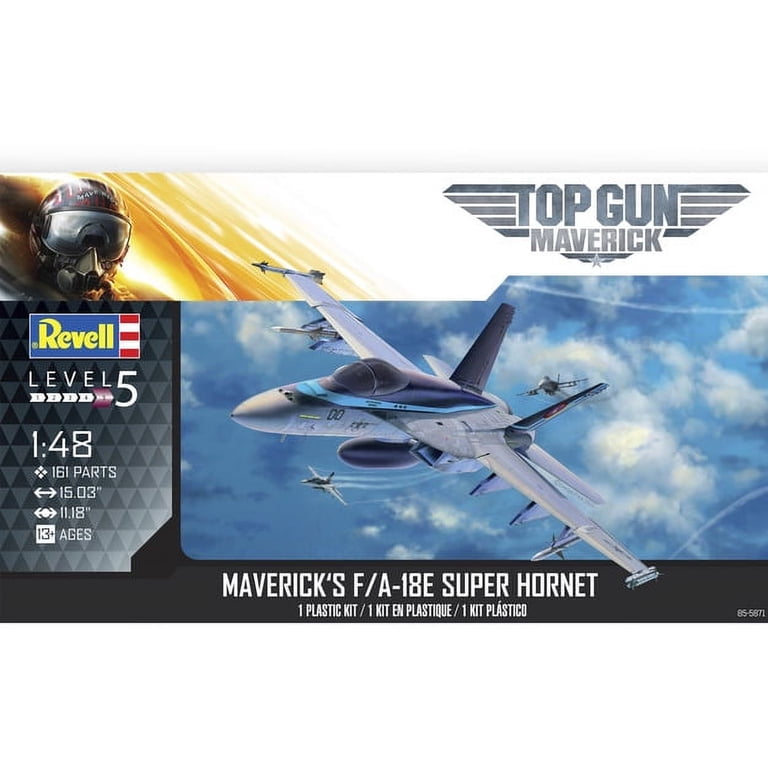
| Revell 85-5871 Maverick's F/A-18E | 1:48; 161 parts; Revell level 5; about 15.03 inches long with an 11.18-inch wingspan. | Paint, cement and tools are separate. |
The compact Bf 109 offers fewer parts and selected supplies in the package. The larger Super Hornet demands more assembly and display space. Compare the instructions and paint scheme before deciding which work you want; these are Revell ratings, not a difficulty scale for every manufacturer.
Revell 85-5871 F/A-18E kit example

Check the Revell F/A-18E kit and current availability, or compare the Revell Bf 109 G-10 starter package. For other subjects, browse aircraft model kits.
Choose scale from the finished wingspan
1:144 scale
At 1:144, fighters and airliners can fit compact shelves and squadron displays. Small landing gear, antennas, and decals demand precision. A small kit is not automatically easy; tiny parts and narrow paint masks can increase difficulty. The Revell 1:144 Spitfire and Hurricane Starter Kit offers two compact aircraft whose exact package contents should be checked.
1:72 scale
1:72 is a common balance between collection size and visible detail. Fighters are usually manageable, while bombers and transports can still be large. The Revell Bf 109 G-10 starter kit is a specific 1:72 example; compare its actual dimensions and part size with the space you have.
1:48 and 1:32 scale
Larger scales reveal cockpit, engine, landing gear, and surface detail, but demand more shelf space and paint. The Revell 1:48 F/A-18E Super Hornet and Tamiya 1:32 A6M5 Zero should be planned from finished length and wingspan before purchase.
Read the exact aircraft configuration
Aircraft names can hide important variants. A Bf 109 G-10, Spitfire Mk.Ia, F/A-18E, and Mitsubishi A6M5 Model 52 are specific configurations. Wings, canopy, tail, armament, engine, antenna, and markings can differ across variants. Match the box item number and instructions to the reference you intend to build.
Do not copy a paint scheme from a visually similar variant without checking. A kit may include several decal options, and each option can require different colors, equipment, or small parts. Choose the marking option before closing the fuselage.
Cockpit planning comes first
The cockpit is usually enclosed early. Paint and assemble the tub, seat, instrument panel, sidewalls, controls, and interior details before joining the fuselage. Dry-fit the cockpit inside both fuselage halves to ensure it does not spread the seam or sit too low.
Seat belts, decals, instrument panels, and clear displays vary by kit. Add aftermarket detail only when it will remain visible and can be installed cleanly. A closed canopy can make perfect hidden detail less useful than a correctly aligned fuselage.
Protect the canopy
Clear parts scratch and fog easily. Separate them with clean cutters, sand attachment points away from visible panels, and use a clear-part-compatible adhesive. Ordinary solvent cement or cyanoacrylate vapor can damage transparency. Test any adhesive or clear coat on spare clear material.
Mask the canopy frames with precut masks, narrow tape, liquid mask compatible with the plastic, or a careful combination. Burnish edges gently and avoid pressing hard enough to crack the part. Install or temporarily fit the canopy according to the paint plan.
Control fuselage and wing seams
Dry-fit the fuselage, wings, intakes, and tail before applying cement. A cockpit, bulkhead, or wheel well can push the outer parts apart. Correct the internal fit rather than clamping the shell around an obstruction.
Aircraft seams often cross curved surfaces and panel detail. Apply adhesive carefully, let the joint cure, then sand progressively. Use filler only where the real airframe does not have a visible panel line. Replace lost detail only after the surface is smooth.
Set wing alignment
Dihedral—the upward angle of the wings—affects the aircraft’s stance. Use the instructions and front-view references. Check that both wing tips sit at equal height and that the tailplanes are level relative to the wings. Let structural joints cure in a jig or supported position.
For swept-wing jets, compare leading-edge sweep and wing-root fit on both sides. For biplanes, alignment becomes more complex because upper wing, struts, and rigging interact; a simple monoplane is usually a better first aircraft.
Plan landing gear and weight
Some tricycle-gear aircraft need nose weight to avoid sitting on the tail. The instructions may specify an amount or location. Use a secure material that will not react with the plastic, and test the balance before closing the fuselage.
Landing gear is fragile and easy to misalign. Decide whether to install it before paint for strength and integration or after paint for protection and access. Gear doors, struts, wheels, and bays often have specific left/right orientation.
Paint in an efficient sequence
- Complete interior colors and close the major airframe.
- Correct seams and prime the model.
- Paint light or difficult underside colors first when the scheme allows.
- Mask and apply upper camouflage in thin layers.
- Paint details such as radome, exhaust, wheel wells and anti-glare panels.
- Apply a smooth surface for decals.
- Add decals, weathering and final clear finish.
- Install fragile gear, propeller, pitot, antennas and ordnance near the end.
The exact sequence changes with the aircraft. An airbrush can make broad camouflage easier, but careful brush painting remains valid. The airbrush paint guide covers thinning and layering, while the Vallejo guide separates paint ranges.
Use decals with references
National markings, serials, stencils, walkways, nose art, and unit codes can be numerous. Identify the chosen option and mark off each decal as it is applied. Use a smooth surface, position one decal at a time, and let setting solutions work without touching softened film.
Stencils can improve realism, but they are not worth rushing. Work in sections and compare orientation. If an old decal sheet appears yellowed, cracked, or brittle, test an unused marking first and consider a compatible protective method.
Weather to the aircraft and era
Weathering should reflect material, maintenance, climate, and operation. Exhaust, oil, chipped paint, faded fabric, fluid stains, and panel variation differ between a carrier fighter, museum restoration, desert aircraft, and modern display team. Use references rather than applying the same dark wash to every panel.
A clean aircraft can be accurate. Restraint preserves scale. Photograph the model after the clean finish so weathering can be evaluated as a separate decision.
A first-aircraft checklist
- A motivating subject with manageable wingspan.
- A variant and marking option understood before assembly.
- Clear instructions and no missing parts.
- Cockpit and canopy plan.
- Simple landing gear and limited external stores.
- A paint scheme suited to available tools.
- Display space and dust protection ready.
The existing plastic-model starting guide offers another beginner path. The broad model kit guide covers universal assembly fundamentals.
Frequently asked questions
Is 1:72 the best scale for beginners?
It is often manageable, but a small fighter can have tiny parts, while a large transport can be substantial. Choose from actual dimensions, engineering, and paint complexity.
Do aircraft model kits include paint and glue?
Some starter sets do; many kits do not. Read the exact package contents.
Should landing gear be installed before painting?
It depends on kit engineering and access. Installing early can strengthen joints but risks breakage and complicates masking. Dry-fit and plan the sequence.
Muncle Mikes tip: Choose the marking option before the fuselage closes. Cockpit details, antenna parts, nose weight, and paint choices may depend on that decision.
Return to aircraft model kits with your scale, marking option and display dimensions selected, or continue in the Muncle Mikes Learning Center.

