

Storage
Wall-Mounted Hot Wheels Displays: Shelf Size, Case Fit & Mounting
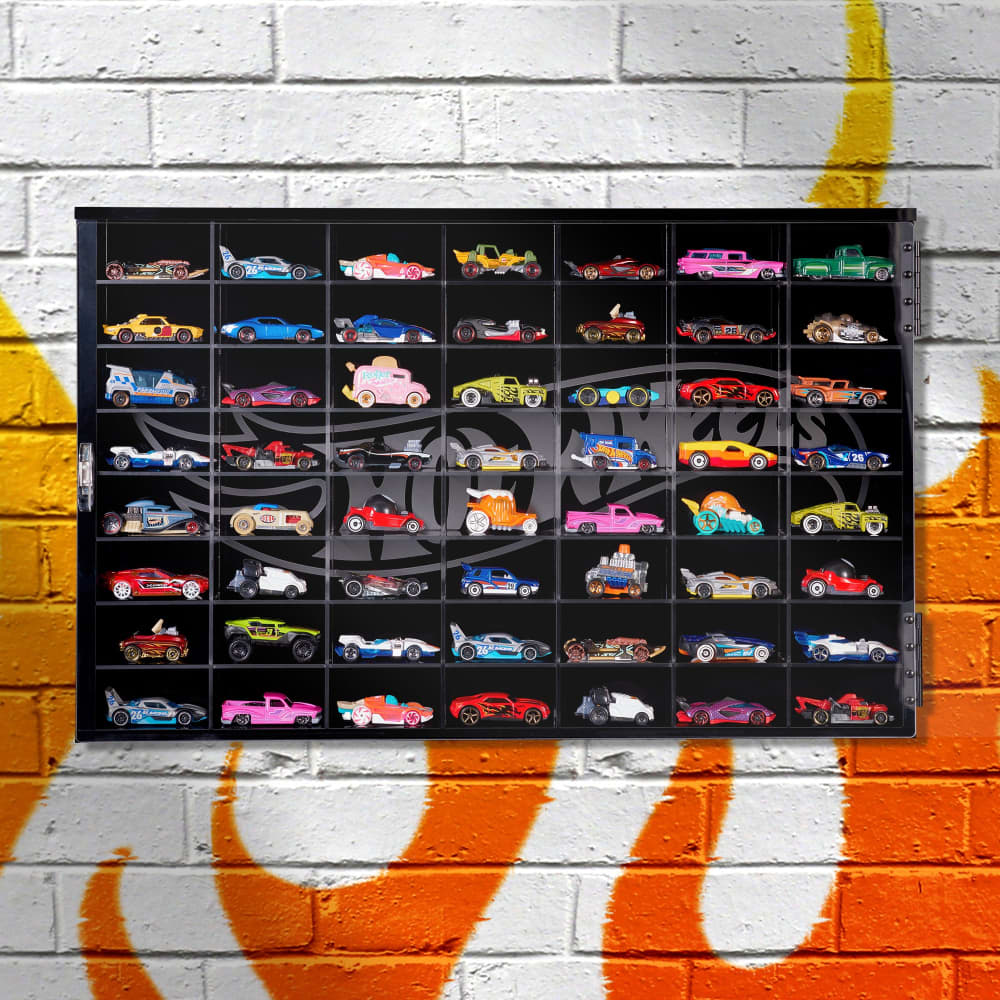
Fit, support and access planning for wall-mounted and shelf displays
A useful wall-mounted Hot Wheels display needs more than enough car slots. It must fit the actual models, open comfortably and attach to a suitable support using the manufacturer's mounting instructions.
Choose the display format before arranging the wall. A divided cabinet, an open shelf and a rack for retail cards have different space and protection requirements.
A documented cabinet example
Mattel's JNN88 56-car display case lists an outside size of 24 inches wide, 15 inches high and 2 inches deep. Its 56 slots are described as 3.25 × 1.75 × 1.75 inches. The product includes a hinged front, rear screw slots and a manufacturer claim of UV protection; cars are not included.
The header is a reference image for that cabinet, not a Muncle Mikes stock offer or an installation plan. Use the current manufacturer's specifications and instructions for the exact item purchased.
The compartment measurements are especially useful: compare each unusual casting with them rather than assuming every vehicle sold as 1:64 fits. A long transporter, broad custom or tall truck may need a different home.
Choose cabinet, shelf or carded rack
A divided cabinet gives each loose car an assigned position. Check the viewing angle and whether the door can open without hitting a nearby frame or shelf.
An open shelf allows flexible spacing, but it does not make the cars dust-free. Consider how a car is prevented from rolling or being knocked off, and choose supports that do not press on delicate details.
A carded rack displays the retail presentation. Measure the card, blister and any protector together. Avoid a fit that bends the card or requires pulling against the blister to remove the item.
Map the whole wall arrangement first
Make a layout using the actual outside dimensions, including door movement. Check the normal viewing position, nearby doors and furniture, and the space needed to lift items out without stretching over another display.
For multiple cabinets, leave a practical gap for installation and access. Do not assume aligning the visible fronts automatically aligns their mounting points. Keep a diagram with each unit's model number and intended position.
Consider where children or pets can reach the display. Do not arrange climbable furniture below an attractive collection or place heavy displays above sleeping or seated areas without appropriate installation advice.
Match mounting to the wall and loaded weight
Use the display maker's specified fixing method and account for the case, cars and accessories together. Wall construction, support locations and the hardware rating matter; there is no single screw or anchor recommendation that suits every installation.
Do not treat adhesive strips, an improvised hook or screws supplied for another cabinet as interchangeable with the required hardware. When the supporting construction or instructions are unclear, use a qualified installer.
The CPSC's Anchor It! guidance addresses securing furniture against tip-over. A freestanding shelving unit used beside the wall display has its own anchoring needs; a wall-mounted cabinet does not remove that separate risk.
Plan light, access and cleaning
Choose a position without direct sunlight where possible and review any stated glazing protection rather than assuming all clear covers perform alike. A UV claim is not a guarantee against every form of fading, heat or aging.
Clean the empty display according to its own instructions, not a recipe intended for the cars. Keep spray cleaners away from the models and retail packages. Recheck the condition of hinges, closures and mounting points during routine access.
For broader format choices, read the display-case buying guide.
Keep tabletop cases in their intended role
The Muncle Mikes single-car clear case is a separate stackable display option. Its listing does not describe a wall-mounting system. Do not drill, glue or suspend it as though it were the cabinet discussed above.
Choose suitable cases for a stable shelf, or choose a purpose-built wall unit with a supported installation method. Then organize finished customs or loose cars by the views and themes you enjoy, leaving room to handle each item comfortably.
Use a final installation checklist
- Measure the collection. Record the longest, widest and tallest loose vehicle, plus the outside dimensions of every card protector.
- Measure the display. Distinguish interior slot clearance from the cabinet’s outside dimensions and allow room for its door or cover to open.
- Confirm the support. Use the display manufacturer’s instructions, identify the wall construction and include the loaded weight. Ask a qualified installer when the support or fastener choice is uncertain.
- Test the route. Make sure a car can be removed without lifting it over another cabinet, leaning across furniture or pressing fragile parts against a divider.
- Recheck after use. Inspect fasteners, hinges and closures periodically and after moving or changing the load.
For collection-wide planning, continue to the display-case guide or the large-collection storage guide.
Use cases as components of a wall plan—not assumptions about mounting

Tabletop/shelf case
1:64 crystal clear case
A single-car case can sit on a shelf; it should not be treated as wall-mount hardware unless the product says so.

Rigid display case
GreenLight 1:64 acrylic case
Useful on a shelf inside a wall display plan, but still separate from the cabinet or mounting system.

Card protection
Sterling card protectors
Protect the card first, then design the rack or wall storage around its actual outer dimensions.

